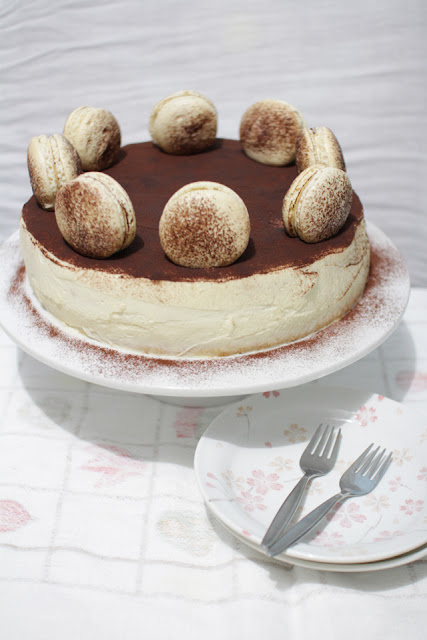
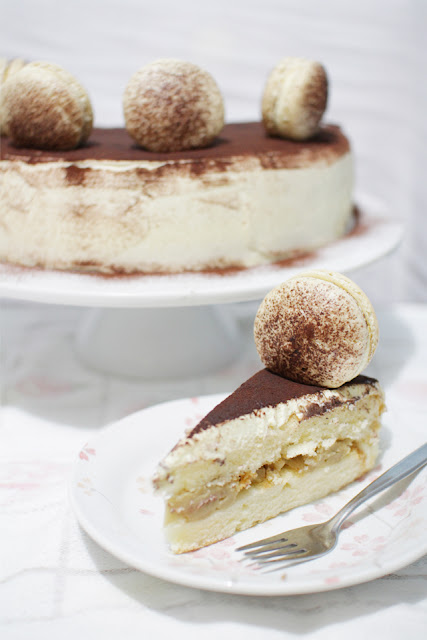
How can I ever get sick of tiramisu? Maybe never. It's quite a challenge yet refreshing to bake something different to the original version. I had this cake envisioned in my mind for about a month now and had finally put it altogether for Mother's Day. It's a day to celebrate everything that a mother can give, the unconditional love, the wise advice, the shoulders that spread like wings for us to lean on. She's the pillar of the family that keeps everything in harmony and she's the definition of blissful happiness even though she doesn't appear to be perfect to others. I just wanted to say Happy Mother's Day to my beautiful Mother as well as to all the amazing mum's out there.
Personally, I had cravings for a chiffon cake which then sort've replaced the idea of using a sponge cake instead which would've fitted the tiramisu hybrid theme better. The day was quite a disaster. The chiffon cake dried up overnight since I didn't wrap it in cling film to keep it moist. But luckily it was saved in the end when it got covered by the mascarpone topping. I should've made double the amount of coffee creme patissiere to spread between the layers since I was struggling to have it evenly spread across the cake and a lot of my macarons cracked to my disappointment. It seems like disasters befall whenever I want to deliver the best. Fortunately, everything still tasted good and that was what matters. The coffee crème patissiere wasn't too sweet and the cocoa powder sifted on top gave this cake a good balance in regards to the sweet scale.
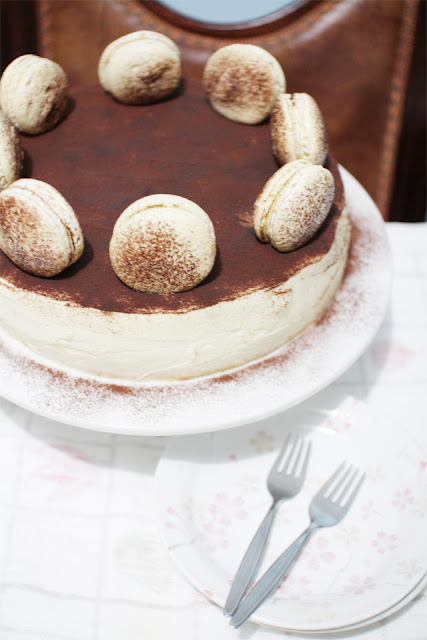
There are a few variations that could've been made I guess. You could soak the cake in coffee syrup to maintain it's moisture to have it more like a tiramisu-styled cake. A coffee flavoured chiffon cake or even a sponge cake would suffice. Crème patissiere is hard to spread so you could defrost it first then spread it out or replace with a coffee cream or frosting you like. Whatever you wish to do, have fun and enjoy the cake!
Tiramisu Chiffon Cake and Macarons
Coffee Macarons
115g almond meal
230g icing sugar
144g egg whites, room temperature (You
can zap fresh egg whites from the fridge in the microwave on defrost for 10
seconds)
72g caster sugar
1 teaspoon water
1 teaspoon coffee powder
1. Sift the almond meal and icing sugar together in a medium bowl and set them
aside.
2. Mix the water and coffee powder together in a small bowl. Using an electric mixer in a medium bowl, beat the egg whites
together with the caster sugar and coffee mixture at medium speed for 3 minutes (4 on a
Kitchenaid).
3. Increase
the speed to medium-high (7 on a Kitchenaid) and whip for another 3 minutes,
then increase to highest speed (8 on a Kitchenaid) and beat for another 3
minutes. You
should have a very stiff, dry meringue, if not beat for another minute or until it does so. When you remove the whisk attachment,
there will be a clump of meringue in the centre, just knock the whisk against
the bowl to free it.
5. Dump in the sifted dry ingredients all at once and fold
them with a rubber spatula. Use both a folding motion (to incorporate dry
ingredients) and a rubbing/smearing motion to deflate the meringue against the
side of the bowl. Take care not to overmix, the mixture should flow like lava
and a streak of mixture spread over the surface of the rest of the mixture
should disappear after 30 seconds to a minute. Approximately around 30
strokes/folds of the batter will be just enough.
6. Place in a piping
bag and pipe rounds of about 3cm diameter on lined baking sheets or silicon
baking mats. Hold onto the baking sheet and tap them hard against your bench top
to remove any extra bubbles from your piped shells. Sift some cocoa powder on top if desired. Preheat the oven to 150°
C/130°C fan-forced. Leave shells on bench to dry for about 30 minutes to
an hour, or until a shell forms around the piped macaron (I generally leave
them for 20-30 minutes).
7. Bake for about 18 minutes, or until you can
clearly peel the parchment paper away from a macaron. Cool thoroughly on the
pans before peeling the cooled macarons from the parchment. Use a spatula or
plastic scrape if necessary.
8. Pipe the mascarpone frosting (recipe
below) on a macaron shell, then sandwich it with another macaron shell.
Refrigerate overnight. Can be stored in the fridge in an airtight container for
several days.
Chiffon Cake
Part I
6 large egg yolks
3/4 cup water
1/2 cup vegetable or canola oil
1 teaspoon vanilla extract (I use vanillin)
3/4 cup caster sugar
2 1/2 teaspoon baking powder
1 teaspoon salt
1 1/2 cup plain flour
Part II
6 large egg whites
1/2 teaspoon cream of tartar
3/4 cup caster sugar
1. Preheat the oven to 175°C/155°C fan-forced. Sift flour, baking
powder and salt in a bowl and set aside.
2. In a large mixing bowl, beat egg yolks, water, oil, vanilla and
sugar together until combined. At low speed, add in the flour mixture and beat
until the batter is smooth.
3. In another large mixing bowl, beat the egg whites and cream of
tartar at high speed for approximately 1 minute. Reduce to medium speed and
gradually add in the sugar. Continue beating until very stiff and shiny. Be
careful not to overbeat the egg whites. Do the overturn test where the egg white
mixture shouldn't fall out from the bowl.
4. Using a spatula fold in the egg white mixture into the egg yolk
mixture until well combined.
5. Bake in a 9-10 inch no non-stick cake tin for 55-65 minutes or
until the cake springs back when lightly touched.
6. Invert and cool in cake tin over a wire rack. When cool, loosen
edges with a knife and remove from the cake tin.
Notes:
- I used 2 no
non-stick cake tins (25cm in diameter and 5cm in height).
- Don't fill cake batter more than 1/3
full of the cake tin or else there'll be an overflow.
- The remainder of my cake batter was put into cupcake moulds and baked for approximately 30 mins
- Be gentle when removing the cake
from the tin, because it sticks to the base the cake can rip easily.
Coffee Crème Pâtissière
(Note: I would double the amounts below to use for the entire cake)
3 egg yolks
60g caster sugar
25g cornflour
1 teaspoon instant coffee powder
1/2 vanilla pod (I substituted with 1/2 teaspoon vanillin)
250ml whole milk
15g unsalted butter, cubed
1. In a large saucepan boil milk and vanilla over low-medium heat.
In a medium bowl, whisk egg yolks, sugar, cornflour and green tea powder
together.
2. Slowly add boiled milk to the egg mixture whilst whisking.
Return mixture to the stove over low-medium heat and continue whisking until it
gets thick in texture.
3. Add in the butter and whisk until melted and crème is smooth.
Put a cling film over and leave to cool in the fridge for 30-60 minutes. It can
also be left overnight.
Mascarpone Frosting
250g mascarpone cheese
400g thickened cream
1/2 cup icing sugar, sifted
Using an electric mixer at medium speed, beat the cream until stiff peaks form. Be careful not to overbeat. In another bowl, beat the mascarpone cheese and icing sugar until smooth. Gently fold the whipped cream into the mascarpone mixture until fully incorporated. Use immediately.
Assembly
1. Spread the coffee crème patissiere as evenly across a layer of cake with a metal spatula running under hot water. Place the second layer of cake on top.
2. Crumb coat cake with a thin layer of the mascarpone frosting around the cake then spread the remainder afterwards. Dust cocoa powder on top if desired.
3. Place the tiramisu macarons on top of the cake when serving, or else it'll become soggy.